

As a seasoned stock market expert who has spent years dissecting charts, analyzing market sentiment, and, crucially, leveraging the powerful tools available on platforms like TradingView, I’ve come to appreciate the nuances of accessing and utilizing every advantage. One such advantage, often overlooked by newer traders, lies in the realm of invite-only indicators. These aren’t your run-of-the-mill moving averages or RSI; these are often custom-developed, proprietary algorithms designed by experienced traders or developers who choose to share their insights with a select group. Gaining access to and effectively deploying these specialized tools can significantly enhance your analytical capabilities and provide unique perspectives that aren’t readily available to the broader market.
The appeal of invite-only indicators is multifaceted. For the developer, it offers a way to protect their intellectual property, monetize their work, or simply share advanced strategies with a trusted community. For the user, it provides access to potentially powerful, edge-giving tools that are often the culmination of years of trading experience and coding expertise. However, the process of acquiring and implementing these indicators isn’t always as straightforward as clicking a button. It requires a specific workflow, attention to detail, and an understanding of how TradingView’s robust ecosystem handles these specialized scripts. In this article, I will guide you through the precise steps to add and effectively use invite-only indicators on TradingView, ensuring you can unlock their full potential.
Securing Access from the Indicator’s Creator
The journey to utilizing an invite-only indicator on TradingView invariably begins with one fundamental step: obtaining access directly from the author or vendor. Unlike public indicators that are freely available to all users, invite-only scripts are by their very nature private. This means the individual or entity who developed the indicator maintains complete control over who can use it. Think of it as an exclusive club where membership is granted at the discretion of the club owner.
Understanding the Private Nature of Invite-Only Scripts
Invite-only scripts are a specific category within TradingView’s Pine Script ecosystem. When an author publishes a script and designates it as “Invite-only,” they are essentially setting up a digital gate. This gate ensures that only specific TradingView usernames that they manually whitelist will be able to see, add, and utilize the indicator on their charts. This mechanism is crucial for protecting proprietary strategies, offering premium services, or managing access for a select group of clients or students. Without this explicit grant of access from the author, the indicator will simply not appear in your TradingView account, regardless of how diligently you search for it.
Providing Your TradingView Username
The critical piece of information you need to convey to the author is your exact TradingView username. This might seem like a minor detail, but it’s paramount. TradingView’s system relies on precise username matching to grant access. Many vendors streamline this process by providing clear instructions on how to submit your username. This could be through a dedicated section on their website, a form you fill out after purchase, or simply by requesting it via email or a messaging platform as part of the script’s description. It’s absolutely essential to provide the correct username, as even a single character mismatch will prevent the author from adding you to their access list, thus delaying your ability to use the indicator. Double-check your username in your TradingView profile to ensure accuracy before sending it to the vendor.
If you’re looking to enhance your trading experience on TradingView, you might find it beneficial to explore related topics such as the integration of advanced trading strategies. A great resource for this is the article on RocketAlgo, which discusses the latest updates and features in their trading platform. You can read more about it here: RocketAlgo Updates. This article provides insights that can complement your understanding of invite-only indicators and their practical applications in trading.
Verifying Your TradingView Account and Login State

Once you’ve submitted your username to the author and they’ve confirmed granting access, the next crucial step is to ensure you are logged into the correct TradingView account. This might sound obvious, but it’s a common pitfall that can lead to frustration if the indicator doesn’t immediately appear.
The Importance of Matching Accounts
TradingView’s access control for invite-only scripts is inextricably linked to the specific username that the author enabled. If the author granted access to “TraderPro123,” but you are logged into your TradingView account as “MarketAnalystX,” the indicator will not be visible to you. It’s a precise matching system. This often becomes an issue for individuals who might have multiple TradingView accounts (perhaps one for personal use and one for a business, or an older account they rarely use). Before expecting to see the invite-only script, always verify that you are actively logged into the exact same TradingView account that you provided to the author. This small verification step can save you a lot of troubleshooting time.
How to Confirm Your Logged-In Account
To quickly confirm which account you’re logged into, simply look at the top right corner of your TradingView interface. Your profile picture or initial, along with your username, should be clearly displayed. If you suspect you’re in the wrong account, or if you’re unsure, it’s best practice to log out completely and then log back in using the credentials associated with the username you gave the author. This refreshes your session and ensures that TradingView recognizes your authorized account. Without being logged in with the correct account, the indicator simply won’t appear under the invite-only section.
Navigating to the Invite-Only Section on Your Chart
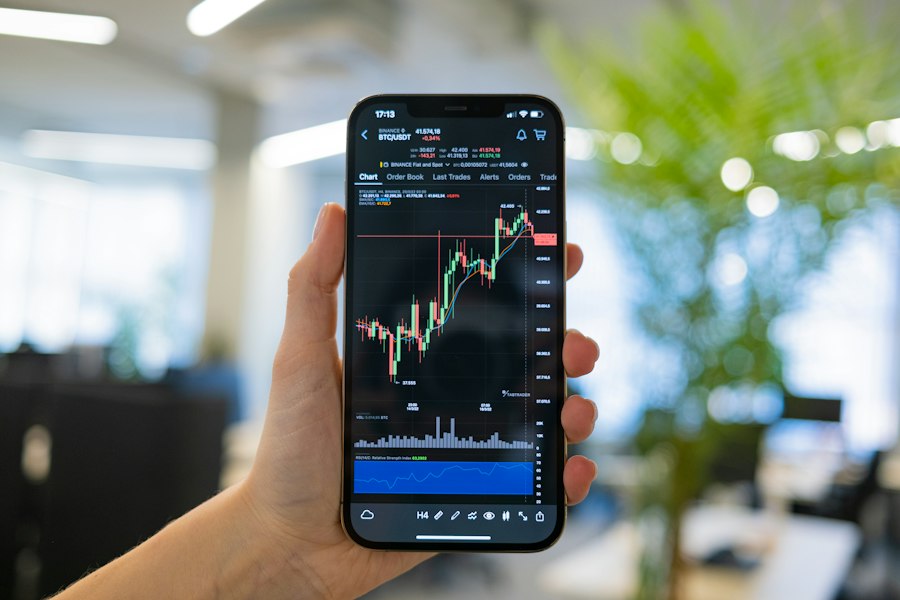
With access secured and your account verified, the next step brings us directly to the TradingView chart interface itself. This is where you will physically locate and add the invite-only indicator to your workspace.
Opening the Indicators Window
To begin, open any chart on TradingView. Whether it’s a forex pair, a stock, a cryptocurrency, or an index, the process remains the same. Look towards the top toolbar of the TradingView interface. You’ll find a prominent button labeled “Indicators” or sometimes “Indicators, metrics & strategies.” Click on this button. This action will open the “Indicators” window, which serves as your gateway to all available scripts, strategies, and drawing tools on the platform. This window is your central hub for anything you wish to overlay or apply to your chart analysis.
Locating the Invite-Only Tab
Once the “Indicators” window is open, you’ll see a panel on the left-hand side. This panel typically categorizes indicators into various sections such as “Built-ins,” “Public Library,” “My Scripts,” and “Favorites.” Under the “Personal” grouping within this left panel, you need to look for a specific tab. This tab will be labeled either “Invite-only,” “Invite-only scripts,” or occasionally “Access is limited.” It’s important to note a key detail here: this “Invite-only” tab will only appear if at least one script has already been shared to your specific TradingView username. If you haven’t been granted access to any invite-only scripts yet, this tab will not be visible in your Indicators window. This is a crucial confirmation that the access process has successfully begun. If you’ve been granted access and still don’t see it, revisit the troubleshooting steps mentioned later, particularly verifying your logged-in account.
Visual Confirmation of Access
The presence of the “Invite-only” tab is your first visual confirmation that the author has successfully granted you access and that your TradingView account recognizes this access. Once you click on this tab, the main panel of the “Indicators” window will populate with a list of all the invite-only scripts that have been shared with your specific username. This list is unique to you and will only display the indicators for which you have explicit permission.
Adding the Invite-Only Indicator to Your Chart
Once you’ve successfully navigated to the “Invite-only” section, the final step in getting the indicator onto your chart is remarkably straightforward.
Applying the Indicator with a Single Click
Within the “Invite-only” list, you will see the names of all the private scripts that have been granted to your account. To add an indicator to your current chart, simply click on its name once. That’s it. There’s no drag-and-drop, no complex configuration at this stage. A single click on the indicator’s name will immediately apply it to the chart you currently have open in the background. You’ll typically see the indicator appear either as an overlay directly on your price candles (like moving averages) or in a separate panel below your price chart (like an RSI or MACD), depending on how the author designed the script.
Adding Multiple Invite-Only Indicators
Many advanced trading strategies involve the use of multiple indicators, sometimes even multiple invite-only indicators from the same or different authors. TradingView accommodates this seamlessly. For instance, if you have access to a suite of indicators like “Midas Up” and “Midas Down,” you can simply click on each one consecutively from your “Invite-only” list, and they will all be added to your chart. Each click will add another instance of an indicator. There’s no limitation on how many invite-only indicators you can add, beyond the general limitations of TradingView’s chart performance and your subscription level. This allows for complex analytical setups using proprietary tools.
Initial Display and Default Settings
Upon adding the indicator, it will appear on your chart with its default settings as configured by the author. These defaults are often designed to provide a useful starting point, but they may not be optimal for your specific trading style, asset, or timeframe. This is where the configuration steps come into play, which we will discuss shortly. For now, the key is that the indicator is now visually present and active on your chart, ready for further customization and analysis.
If you’re looking to enhance your trading strategies on TradingView, you might find it helpful to explore related insights on intraday trading techniques. A great resource is an article that discusses effective methods for analyzing market trends and making informed decisions. You can read more about this in the intraday recap, which provides valuable tips that complement the use of invite-only indicators.
Optimizing and Utilizing Your Invite-Only Indicators
| Metric | Description | Value/Example |
|---|---|---|
| Indicator Type | Type of indicator that can be set as invite-only | Custom Pine Script Indicator |
| Access Control | Method to restrict indicator usage | Invite-Only Access via TradingView |
| Steps to Add Invite-Only Indicator | Number of main steps to add and use invite-only indicators | 4 |
| Step 1 | Publish the indicator as invite-only | Set visibility to ‘Invite-Only Script’ in Pine Editor |
| Step 2 | Request access from the indicator author | Send access request via TradingView platform |
| Step 3 | Author approves access | Author grants permission to use the indicator |
| Step 4 | Use the indicator on charts | Apply invite-only indicator after approval |
| Benefits | Advantages of using invite-only indicators | Protects intellectual property, controls user access |
| Limitations | Restrictions when using invite-only indicators | Cannot view or edit source code, requires author approval |
Having successfully added your invite-only indicator to the chart, the real work of leveraging its power begins. This involves both streamlining your access to it and delving into its functionalities.
Star/Favorite for Quick Access
While the “Invite-only” section provides a dedicated list, constantly navigating there for frequently used indicators can become a minor inefficiency. TradingView offers a convenient way to bring your most important scripts to the forefront: the Favorites system. To star an invite-only indicator, simply hover your mouse over its name in the “Invite-only” list within the Indicators window. A small star icon will appear next to its name. Click this star. Once starred, the indicator will be added to your “Favorites” section, which is typically one of the first tabs you see when you open the main Indicators window. This allows for much quicker access, as you won’t need to navigate to the “Personal” and “Invite-only” sub-sections each time you want to add it to a new chart or a new layout. Favoriting is a simple but effective organizational hack for serious traders.
Configuring Indicator Settings
Once an invite-only indicator is on your chart, it’s crucial to understand that its initial appearance is based on its default settings. To truly unlock its potential and tailor it to your analytical needs, you’ll need to adjust its inputs. To do this, locate the indicator on your chart. You’ll typically see its name (or a shortened version) displayed on the chart itself, often with a small gear icon next to it. Clicking this gear icon will open the indicator’s “Settings” dialog box.
Within the settings, you’ll find various tabs:
- Inputs: This is often the most important tab. Here, the author will have exposed customizable parameters. These could include look-back periods (e.g., length of a moving average component), sensitivity thresholds, specific calculation methods, signal generation criteria, or even options to toggle certain features on or off. Adjusting these inputs allows you to fine-tune the indicator’s behavior to match your trading strategy, the volatility of the asset, or the timeframe you are analyzing. Always refer to the author’s documentation or description for guidance on optimal input values.
- Style: This tab controls the visual appearance of the indicator. You can change line colors, thickness, plot types (e.g., lines, histograms, crosses), background colors, and visibility of specific elements. This helps in making the indicator clear and aesthetically pleasing on your chart.
- Visibility: This tab allows you to control the indicator’s visibility across different timeframes. For instance, you might want a specific indicator to only appear on your 1-hour and 4-hour charts but not on your daily chart.
Experimenting with these settings, in conjunction with the author’s guidance, is key to deriving maximum value from the invite-only script.
Setting Alerts for Real-Time Signals
One of the most powerful features of many invite-only indicators, particularly those designed for generating trading signals, is the ability to set real-time alerts. Depending on how the author has coded the script, you can configure TradingView to notify you whenever specific conditions generated by the indicator are met.
To set an alert:
- Right-click on the indicator directly on the chart, or click the alert icon (a bell) in the indicator’s title bar.
- Select “Add Alert on [Indicator Name].”
- In the alert configuration window, you’ll typically be able to choose the condition that triggers the alert. For custom indicators, these conditions are usually based on the specific plots or signals the script generates (e.g., “Buy Signal appears,” “Trend changes to Up,” “Crosses X value”).
- Configure the frequency of the alert (e.g., “Once,” “Once Per Bar,” “Only Once”), the message it should display, and how you wish to be notified (e.g., popup on TradingView, email, mobile app push notification, webhook).
Setting alerts transforms a reactive analytical tool into a proactive signaling system, ensuring you don’t miss potential trading opportunities generated by the proprietary logic of the invite-only indicator. This functionality is often a core reason why traders seek out these specialized scripts.
If you’re looking to enhance your trading strategies on TradingView, you might find it beneficial to explore the intricacies of forex trading as well. A related article that provides valuable insights is A Comprehensive Guide to Forex Trading for Indian Traders, which covers essential concepts and techniques that can complement your use of invite-only indicators. Understanding forex dynamics can significantly improve your overall trading performance and decision-making process.
Troubleshooting Common Access Issues
Despite following the steps meticulously, it’s not uncommon for an invite-only script to initially not show up. Don’t panic; most of these issues are easily resolved with a few troubleshooting steps.
Initial Delays and Refreshing
One of the most frequent reasons an indicator doesn’t appear immediately after the author grants access is a slight delay in TradingView’s system updating. Access can take a few minutes to propagate across the platform. If you’ve just received confirmation from the author, wait a short time (5-10 minutes) and then re-check the “Invite-only” section.
If it’s still missing, try these basic refresh techniques:
- Refresh your browser page: A simple F5 (or Cmd+R on Mac) often resolves temporary display glitches.
- Log out and log back in: This forces a complete refresh of your TradingView session and re-authenticates your account, often resolving access recognition issues.
- Clear browser cache: In more stubborn cases, your browser’s cached data might be interfering. Clearing your browser’s cache and cookies can often resolve persistent display problems. Be aware this might log you out of other websites.
Verifying Account Details
If the above steps don’t work, the issue almost certainly lies with the account details. This is where meticulous verification is crucial.
- Confirm the correct username was given to the author: Double-check your communication with the author. Did you send them the exact username you are currently logged in with? Even a typo can prevent access. Cross-reference the username in your TradingView profile (top right corner) with what you sent the author.
- Ensure you are logged into that exact TradingView account: This cannot be stressed enough. If you have multiple TradingView accounts, it’s incredibly easy to be logged into the wrong one. Log out of all TradingView sessions and then log back in using the credentials for the specific username that the author enabled. This is the single most common reason for invite-only scripts not appearing.
Contacting the Author
If, after thoroughly exhausting all troubleshooting steps, the invite-only indicator still doesn’t appear, the next logical step is to contact the author or vendor directly. Provide them with your TradingView username and explain the steps you’ve already taken. They can verify on their end whether your username has indeed been added to the script’s access list and can often provide further assistance or clarify if there’s any specific known issue.
Notes for Authors and Vendors of Invite-Only Scripts
For those on the other side of the equation—the developers and vendors creating and distributing invite-only scripts—there are specific considerations and platform rules to keep in mind. Understanding these helps ensure a smooth experience for your users and compliance with TradingView’s guidelines.
Publishing as “Invite-Only”
When publishing a Pine Script that you wish to keep closed-source and control access to, the critical step is to select “Invite-only” as the access type during the publishing process. This designation is what activates the private access mechanism. It ensures that your code remains protected, and only the usernames you explicitly add to the access list can use the indicator. This offers a powerful way to protect your intellectual property, whether you’re building a commercial product or sharing advanced tools with a private group.
Subscription Requirements for Vendors
To publish and effectively manage invite-only scripts as a vendor, TradingView imposes certain subscription requirements. You must have a Premium or Ultimate TradingView plan. These higher-tier subscriptions provide the necessary features and backend access required for managing private scripts, including the ability to add and remove users from your access lists. Standard or Pro+ plans do not support the publishing and management of invite-only scripts. This ensures that authors who are actively developing and distributing these specialized tools have access to the platform’s full suite of professional features.
Managing Access to Your Scripts
Once published as invite-only, managing who has access to your script is done through its dedicated script page on TradingView. On this page, you will find a “Manage access” option. Clicking this will open an interface where you can precisely control your user base. Here, you can manually add new TradingView usernames to grant them access, and similarly, you can remove usernames to revoke access. This granular control is essential for managing subscriptions, trial periods, or member lists for your private community.
Flexibility in Distribution Models
TradingView’s invite-only system is flexible enough to support various distribution models. Authors can publish these scripts publicly, meaning anyone can find the script’s description page (though only authorized users can add it to their chart), or privately for closed groups. This allows vendors to cater to different business models, whether it’s offering a paid subscription service, providing exclusive tools to a mastermind group, or sharing a specialized indicator with a private client base. As long as TradingView’s vendor rules and terms of service are followed, the invite-only mechanism provides a robust framework for controlled distribution and monetization of proprietary trading tools. This flexibility, combined with the security of closed-source code, makes invite-only scripts a highly valuable feature for Pine Script developers.
FAQs
What are invite-only indicators on TradingView?
Invite-only indicators on TradingView are custom indicators created by users that are not publicly available. These indicators require permission from the creator to be accessed and used by other users, ensuring that the creator can control who utilizes their proprietary tools.
How can I add an invite-only indicator to my TradingView account?
To add an invite-only indicator, you need to receive an invitation from the creator. Once you have the invitation, you can access the indicator by going to the ‘Indicators’ section, searching for the specific invite-only indicator, and clicking on it to add it to your chart.
What should I do if I don’t have access to an invite-only indicator I want to use?
If you don’t have access to an invite-only indicator, you can reach out to the creator directly through TradingView’s platform or social media to request access. If they grant you permission, you will receive an invitation that allows you to use the indicator.
Can I share invite-only indicators with others?
No, invite-only indicators cannot be shared with others unless the creator explicitly allows it. The access is controlled by the creator, and sharing the indicator without permission would violate TradingView’s terms of service.
Are invite-only indicators available for all TradingView subscription plans?
Yes, invite-only indicators can be used by any TradingView subscription plan, provided that the user has received an invitation from the indicator’s creator. However, the features and functionalities of TradingView may vary based on the subscription level.

